Quick Start Guide
Updated May 2026
Get your facility up and running in about 15 minutes. We'll walk you through creating a Project, adding Resources, and setting up Events for customers to book.
Before You Begin
Getting started with Fieldspace is pretty straightforward. You'll create a Project (your business location), add Resources (the physical things people book), and set up Events (how those resources appear to customers).
To create a Project, you just need four things:
- A name for your location
- Your address
- A logo
- A brief description
That's it. You can go live with just those basics and add more details later.
Note
Everything saves automatically as you go. Feel free to step away and come back—your progress will be right where you left it.
Step 1: Create Your Account
This takes about two minutes:
- Hit the "Get Fieldspace" button in the navigation
- Enter your email and pick a password
- Tell us your name and how to reach you
- Check your inbox for our verification email and click the link
Once verified, you'll land in your dashboard. This is home base—where you'll manage everything from bookings to payments.
Step 2: Create Your First Project
A Project in Fieldspace represents your business location. If you run a batting cage facility called "Kickmania," that's your Project. If you manage multiple locations, each one becomes its own Project.
- From your dashboard, click "Projects" in the navigation
- Click "Create a project"
- Fill in your Project name
- Add your address (this helps customers find you)
- Upload your logo
- Write a short description of what you offer
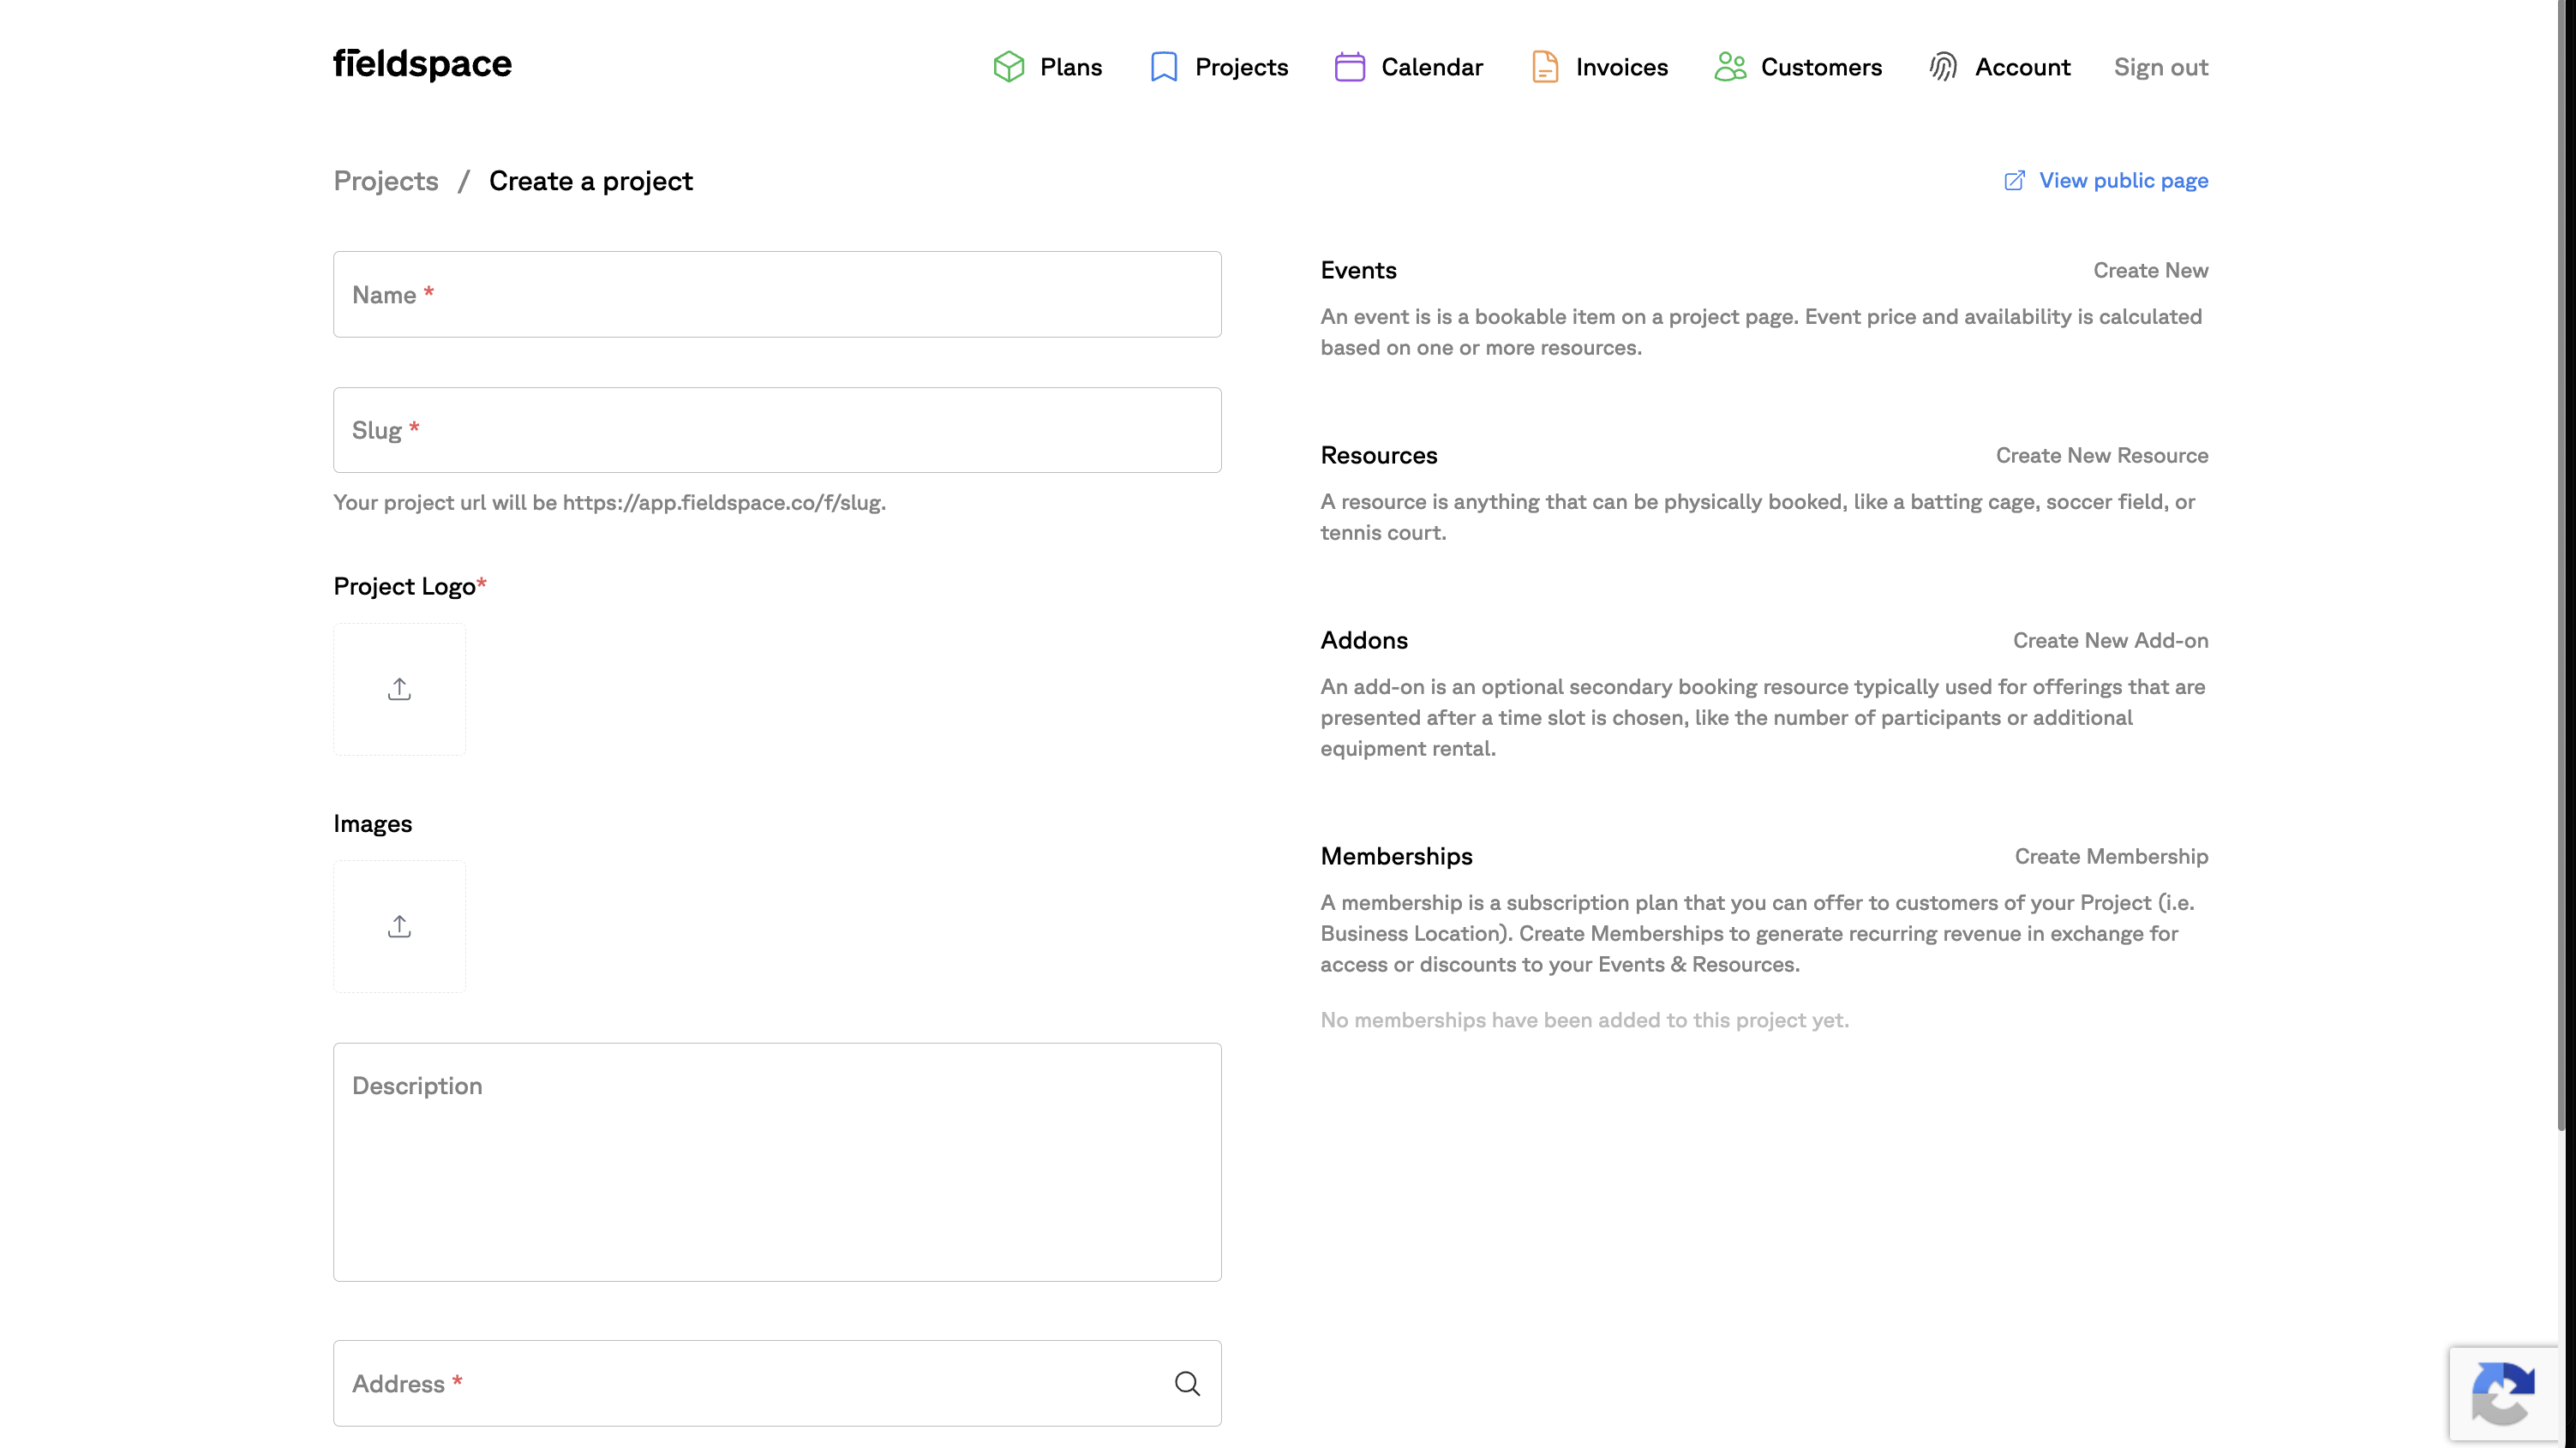
Once your Project is created, you'll see options to add Events, Resources, Add-ons, and Memberships on the right side of the screen. Let's start with Resources.
Step 3: Add Your Resources
Resources are the physical things that get booked—batting cages, swimming lanes, tennis courts, instructors, fields, rooms. Anything that has limited availability and needs to be scheduled is a Resource.
For example, if you run a batting cage facility, your Resources might be:
- Cage 1, Cage 2, Cage 3 (individual cages)
- Coach Mike, Coach Sarah (instructors)
- Pitching Machine A, Pitching Machine B (equipment)
To add Resources:
- In your Project, click "Create New Resource"
- Give it a clear name (customers might see this)
- Add any relevant details or notes
- Repeat for each bookable item
Tip
Be specific with names. "Lane 1" and "Lane 2" work better than just "Lane." This helps you (and your staff) know exactly what's booked when you look at the calendar.
Step 4: Create Events
Events are what customers actually see and book on your public page. An Event groups one or more Resources together and defines the pricing and availability customers see.
Here's where it gets powerful. Some examples:
- Lane Rental — An Event that groups your 8 swimming lanes. Customers see availability if any lane is open. They don't have to pick a specific lane.
- 1:1 Batting Lesson — An Event that requires two Resources: any available batting cage AND any available instructor. Both need to be free for the slot to show as available.
- Court Rental — A simple Event tied to a single tennis court. One Resource, straightforward availability.
To create an Event:
- In your Project, click "Create New" next to Events
- Name the Event something customers will understand ("Open Swim" vs. "Pool Resource 3")
- Select which Resource(s) this Event uses
- Set your pricing
- Configure availability rules (hours, advance booking limits, etc.)
Note
The Event price and availability is calculated based on its Resources. If an Event uses multiple Resources, all of them need to be available for that time slot to show as bookable.
Step 5: Go Live
With your Project created, Resources added, and at least one Event set up, you're ready to accept bookings. Your Project has a public URL that customers can visit to browse Events and book.
- Click "View public page" in your Project to see what customers will see
- Test a booking yourself to make sure everything flows correctly
- Share your booking URL on your website, social media, or email it to customers
Your public page URL follows this format: https://app.fieldspace.co/f/your-slug
Next Steps
That's the basics! Your Project is live and ready to take bookings. Here are some things you might want to explore next:
- Add Add-ons — Let customers tack on extras like equipment rentals, extra participants, or premium options when they book.
- Set up Memberships — Create subscription plans that give members discounts or exclusive access to certain Events.
- Connect payments — Link Stripe to collect payments automatically when customers book.
- Sync with Google Calendar — Push all your bookings to Google Calendar so you can check your schedule from anywhere.
- Invite your team — Add staff members so they can help manage bookings and view the calendar.